

Table of contents


No headings in the article.
Introduction:
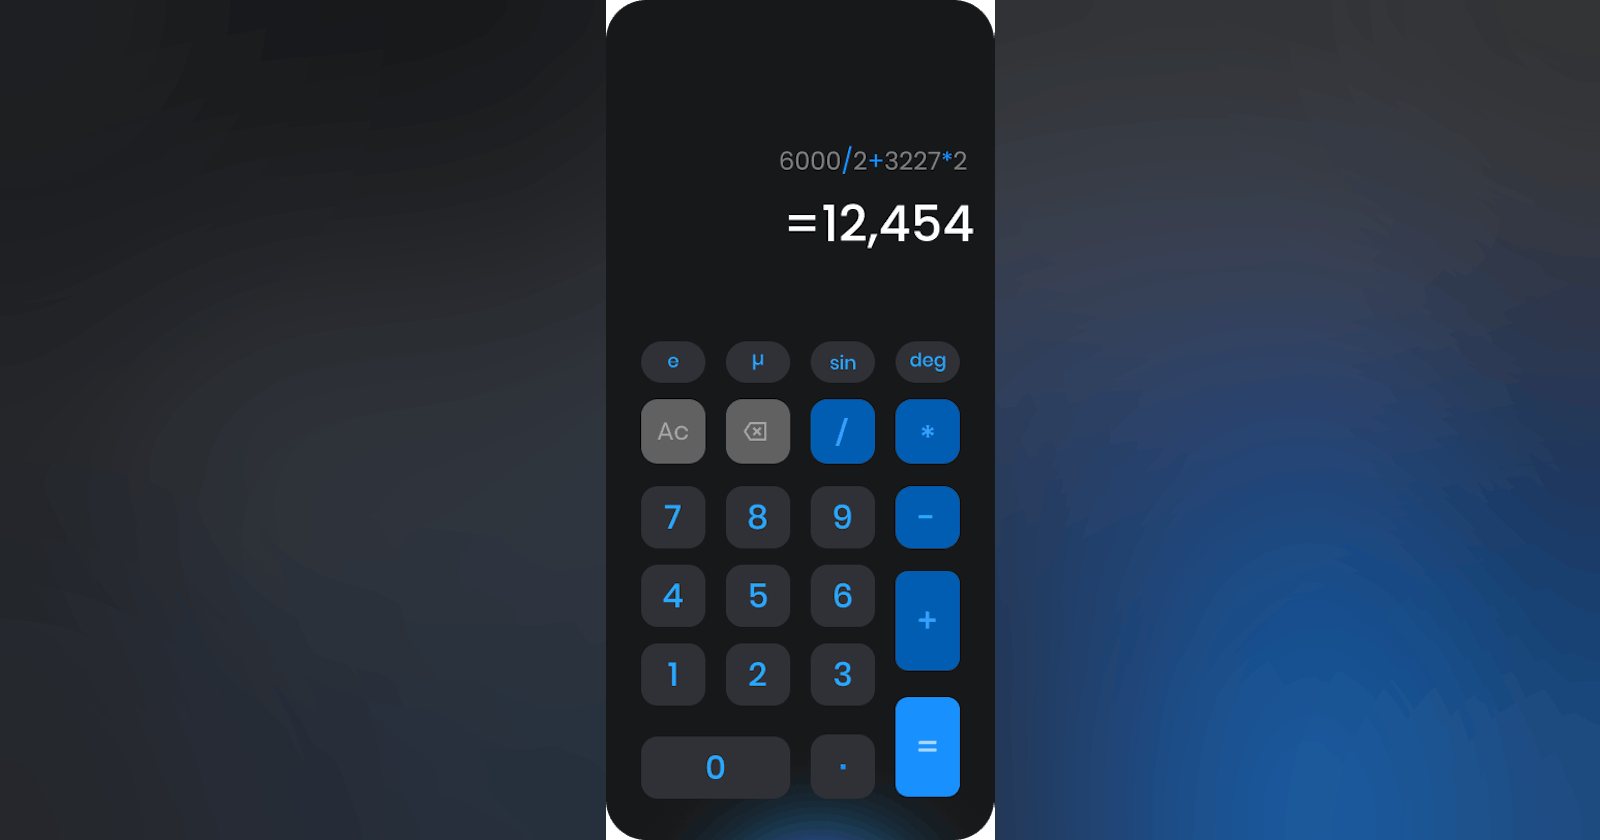
I could write a totally fabricated story about my inspiration to build a calculator application, but the fact is that it is a very good and beginner friendly project to consider when learning any programming language. I built a calculator in react native majorly to build on my UI rendering skills using the inspiration from a design i saw while browsing the internet, and to fully understand state management in react native. I also wanted to learn how to better structure my code by creating reusable components making it easy for anyone who read it to understand how it works with just a few glances. The implementation of this project would also develop the programmer's approach to logic as there are many ways a calculator can be built in react native and many other programming languages as well. I would be showing how I approached this task in this article as I believe writing about a particular project or topic can help you better understand said topic. The design for the calculator is shown below:
Implementation:
I did not have one or even two approaches to this task, I am a bit of an over thinker, so I ran in a lot of circles before finally arriving at in my opinion the best and most straight forward method to completing this project I had taken on.
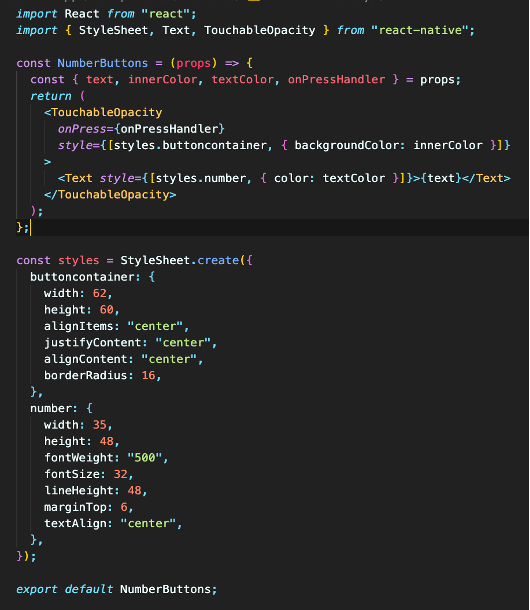
A good place to start would be to render the UI design gotten from Figma to pixel precision, this didn't prove difficult at all since I have a firm grasp on building User Interface. Just make sure to wrap the buttons in the various touchable options we have in react native e.g "TouchableOpacity", "TouchableWithoutFeedBack" e.t.c. since they would need an "onPress" function applied to them which would set the state the calculator display to whatever button is pressed. See below an example of a touchable being implemented:
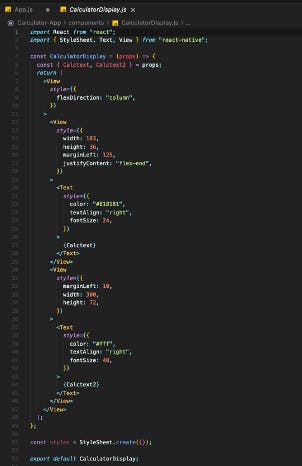
Now that we have the buttons on the screen and we can interact with them, we would need to store the response gotten from the buttons somewhere, this is where the idea of reusable components would come in handy. I simply created a component named "calculatorDisplay" which returns two empty text components and two props "calctext" which can be used to set the first display to whatever expression is to be calculated and "calctext2" which can be used to set the second display to the answer gotten from the expression in the first display. The component was also exported so it could be imported in my main App.js file. See what the implementation of that looks like below:
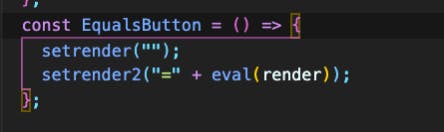
Going forward, the design had been implemented and each button is being rendered to the screen. The major task left was to implement the logic behind that would make the calculator functional, my first approach to this was to set the state of the buttons to whatever numbers they represent, set the state of the plus, minus, divide and multiply buttons to operators and then use the equals button as a function which took in the values and checked for each operator before outputting the answer. This was a good idea at the time and would have worked except for one issue which I will discuss further in the challenges faced section of this article. I tried many other approaches subsequently but for the sake of simplicity I will limit it to just this one as it was the. I always knew JavaScript had an "eval()" function but I did not know at the time that it could also be used to evaluate text data types so I had not given it a second thought. After facing a lot of issues and quite literally re-writing my code from scratch I decide to consider the "eval()" function once again and how I could apply it to my own project. This example from W3Schools (w3schools.com/jsref/jsref_eval.asp) gave me the answer I was looking for all along. Once I realized I could evaluate the expression as it comes in a text, I decided to render all my buttons as text and use the "equalsto" button as a function which calls the "eval()" function and applies it to the calculator display thereby evaluating anything found in the display and setting the state of the second display to the answer gotten from the first display. This made my code shorter and easier to understand.
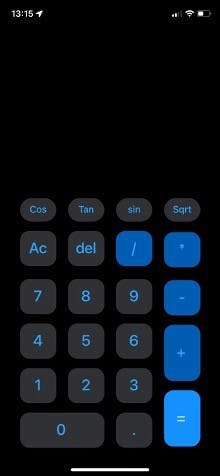
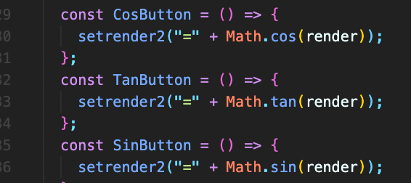
Another interesting part of this project was the logic behind the "special buttons" (sin, cos, tan, sqrt), I decided to model them to follow the same principle as the IOS calculator so when pressed alone they do not perform any action, instead a value is pressed and rendered to the screen which the special buttons can then perform their functions on. The "Math" object was used to implement these actions, see below examples. This was a much cleaner way to write this code since it allowed me to use one-liners as seen in the image below.
Challenges Faced:
As described earlier, the issue with my first approach to the calculator logic was that since the numbers were rendered as actual numbers and not text, I had to write more lines of code to designate each operator (+, -, /, ) and then write a function to take in two values, check for what operator was placed in between them and then perform the operation of that operator. This method would actually work but asides from being overly complex it also brings to realization a very big flaw which is the fact that it could only take in two values (e.g "value1 + value2" but not "value1 + value2 + value3") and can only perform one operation at a time (e.g "value1 + value2" but not "value1+value2value3") which would be specified by the operator, this does not fully cover the scope of what a calculator is supposed to be able to do. A complicated fix for this would be to write more lines of code that will take in the first value, wait for an operator to be added then store the value and then repeat the process till the "equalsto" button is pressed which will then process the expression and return an answer. While this can be implemented, I think the "eval()" method is more efficient and a cleaner way to write this code.
Conclusion:
In conclusion, I think every newbie should try a calculator project in whatever language they may be learning if possible (without following a youTube tutorial to the letter). It is a good way to test programming logic and work through any problems or topics you might come across in the process.